Arch Linux on VirtualBox
Arch Linux is a light-weight Linux distro based on the KISS principle made for x64-86 processors. It uses a rolling release model, meaning there are no “major releases” of completely new versions of the system; a regular system update is all that is needed to obtain the latest Arch software. Arch Linux uses pacman as its package manager, which was written specifically for Arch and is used to remove, install and update software packages.
Installing Arch Linux on VirtualBox
Downloading Arch Linux
We first need the Arch Linux ISO file which can be downloaded from Arch’s official website. You can either directly download or download the torrent, which is on a secure server. Please make sure to have a decent amount of storage space (at least 20GB) and an optimum amount of RAM (not less than 6GB) before the installation. (It is not advised to run VirtualBox on a machine with less than 4GB RAM but that’s not to say that there are people who make it work.)
I chose to torrent the ISO file, and those choosing to do so are requested by the Arch devs to seed the file for a little while too.

Initializing a Virtual Machine on VirtualBox
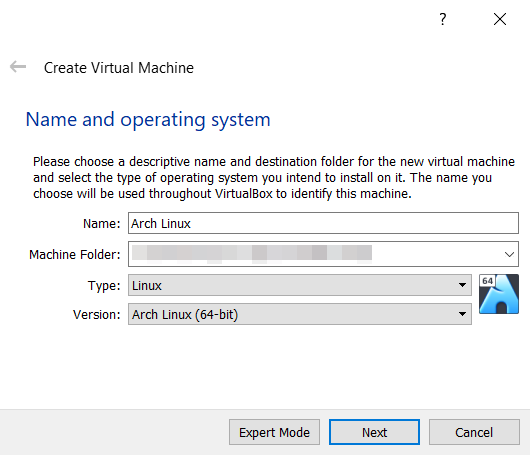
Open the Oracle VM VirtualBox manager and click on New. Type in the name of the operating system for the virtual machine you want to create which, in this case, is Arch Linux. VirtualBox automatically picks up the type and version of the OS, and you can also set where the machine will be stored in your drives. Click on Next.
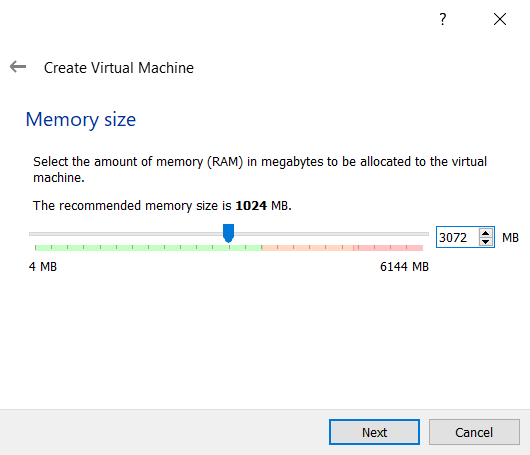
Next, allocate the desired amount of RAM for your new operating system, which is ideally 1024 MB but anywhere in the green region is OK. I set it to half of my available RAM size which is 6GB. Click on Next.
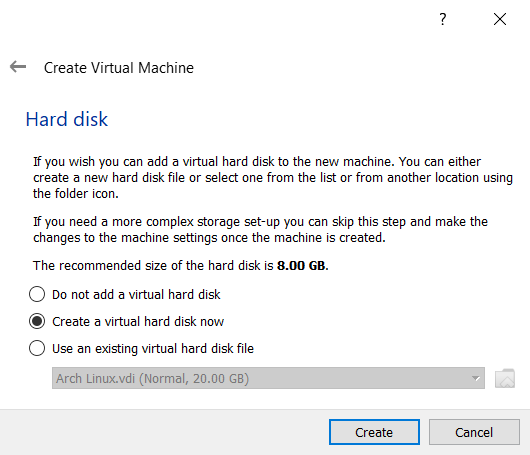
A new pop up appears asking if you’d like to create a virtual hard disk for your new virtual machine. Select Create a virtual hard disk now (selected by default) and click on Create.
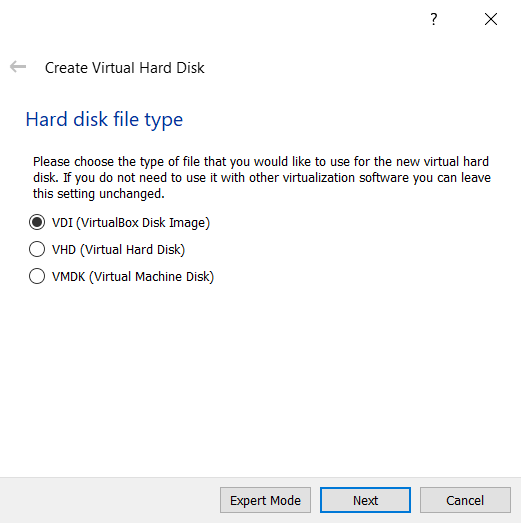
On the next page, you will be prompted to select the type of hard disk you would like to use for your Virtual Hard Disk. VDI (VirtualBox Disk Image) is usually selected. Click on Next.
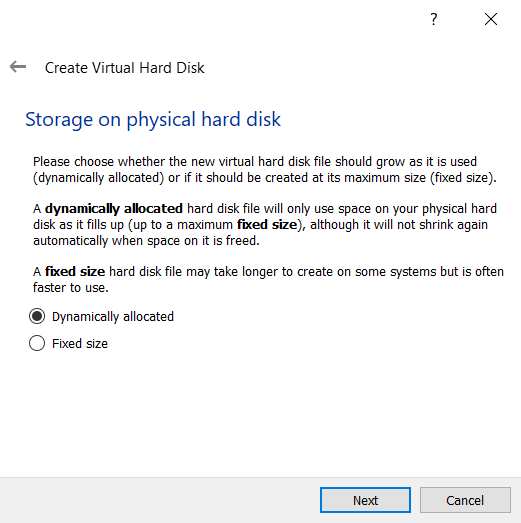
Next, you will be asked to choose the type of storage allocation system for your Virtual Hard Disk and two options are given:
- Dynamically Allocated (space is only used on the hard disk as the storage on the Virtual Machine fills up [upto a maximum size] but won’t shrink again even if space is freed up in the Virtual Hard Disk)
- Fixed size (a disk of fixed size, usually slower to create but faster in usage speeds)
Choose your desired option and click Next.
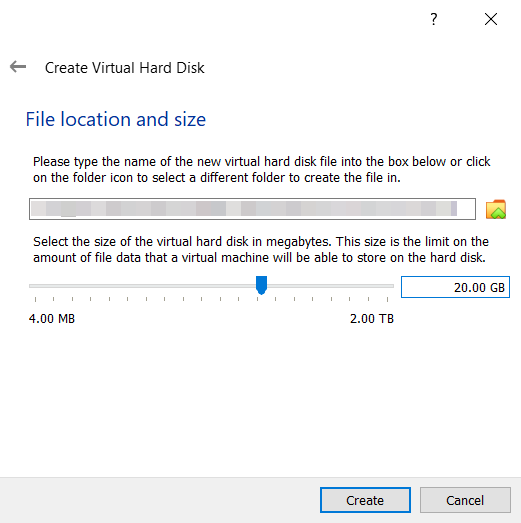
The next tab requires your input on the size of the Virtual Hard Disk - a healthy 20GB will suffice (although you can dedicate more :P). You can also choose the location of storage on your host drive. Click on Create when your happy with the settings.
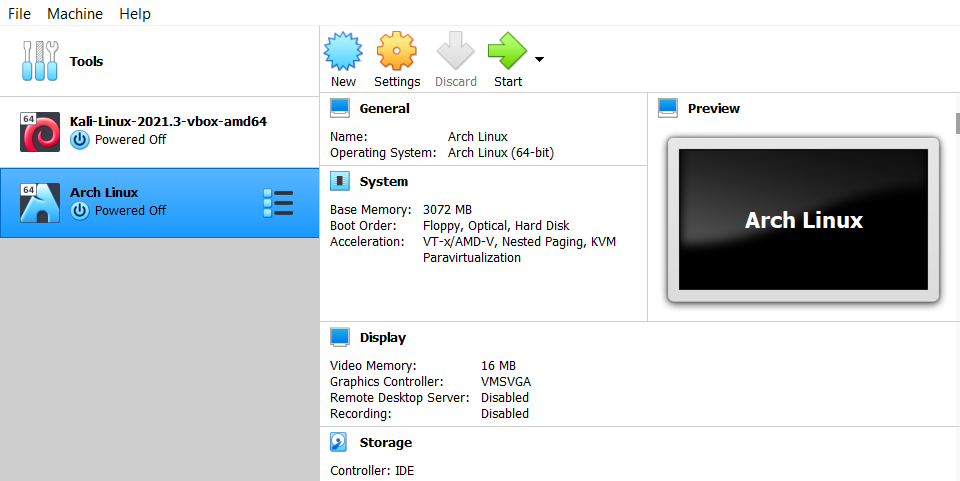
We come out of the Virtual Machine Creation wizard and back to the VirtualBox Manager. You will notice that our Virtual Machine has been created (along with other Virtual Machines if you have added them before).
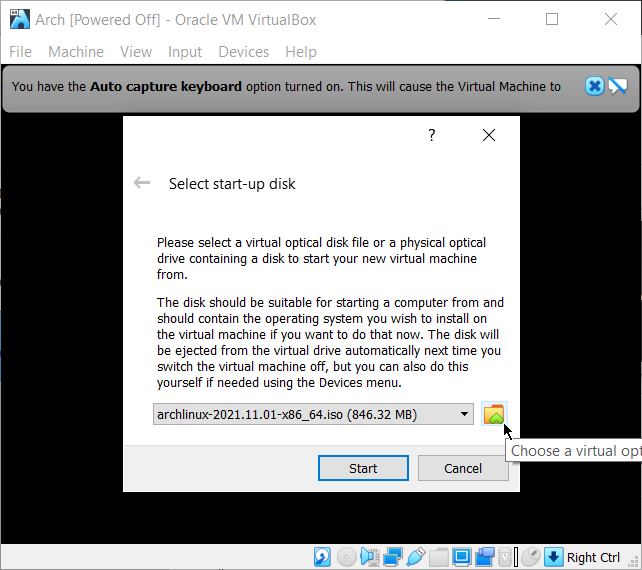
Click Start to power on the virtual machine. When the machine powers on, you will be asked to choose your start-up disk. Navigate to the drive where you had downloaded the Arch Linux ISO file, by clicking on the folder icon and choose the ISO file, and then click on Start.
Booting into Arch
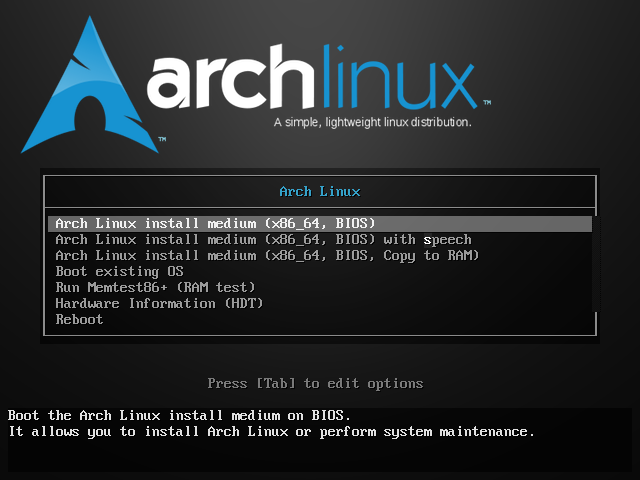
After choosing the start-up disk, the virtual machine boots up into the boot menu. Choose Boot Arch Linux (x86_64) which is used to install the 64-bit version of the OS, and hit enter.
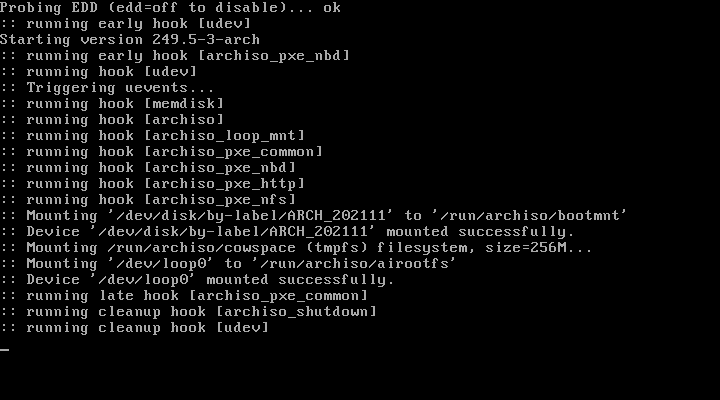
The system starts booting into a temporary live version and we are logged in as the root user.
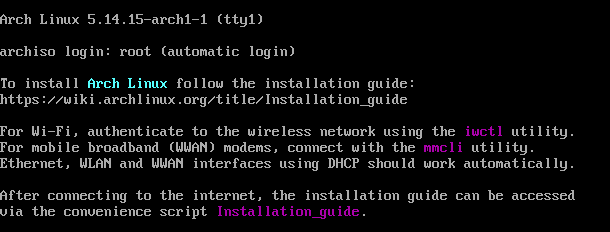
We finally land on tty1, giving instructions on where to find the official installation guide (which is being followed in this procedure)
Disk Partitioning
-
Firstly, check your internet connection using the
pingcommand,ping google.comand press Ctrl+C (^C) to stop the script.
Or alternatively type in:
ping google.com -cxwhich runs the script
xtimes, wherexstands for the number of times you want to pinghttps://www/google.com, and then exits the script.
-
To see your current disk partition, use the
fdisk -lcommand.fdisk -l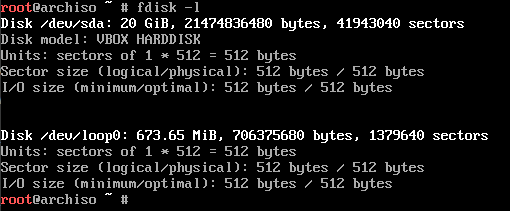
We see the
/dev/sdadisk which has the 20GB we allocated during the VirtualBox initialization. We will now partition this 20GB into three partitions - the first one is the primary root partition that will be of 10 GB. The second will be the swap partition, which should ideally be twice the initial RAM allocation, but I will go with 2GB. The third will be the logical partition which will be the remaining 8GB. -
To partition the drives, use the
cfdiskcommand.cfdisk
You will see a partition type menu with the following options:
- gpt
- dos
- sgi
- sun
Navigate to
dosand hitenter.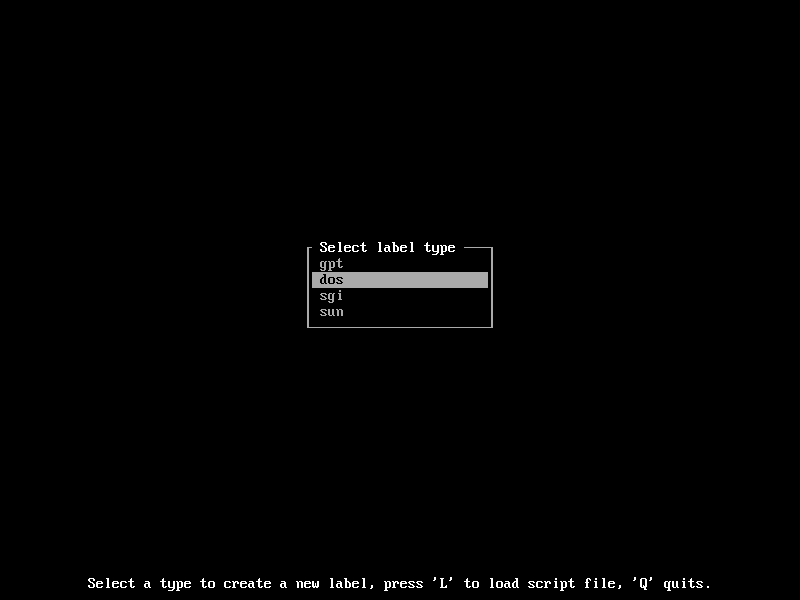
-
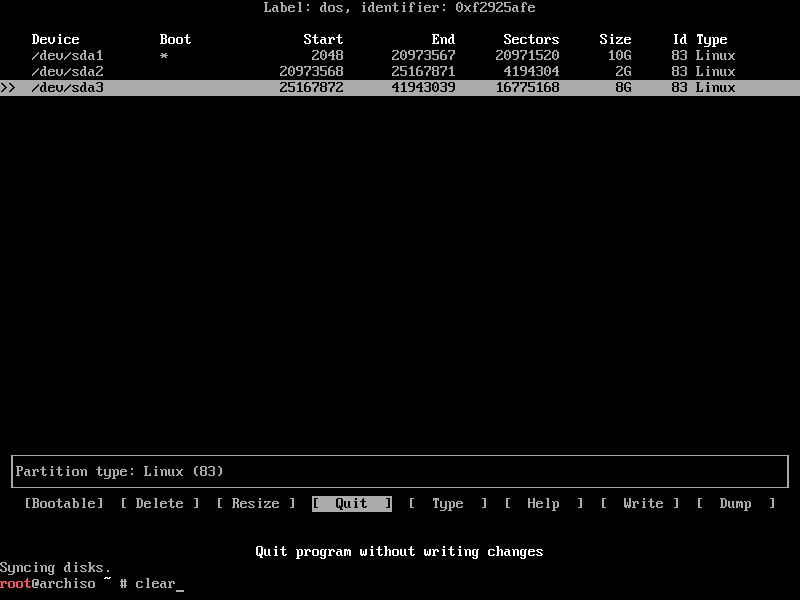
Now we get to see the Partition Menu. The free disk space available is 20GB.
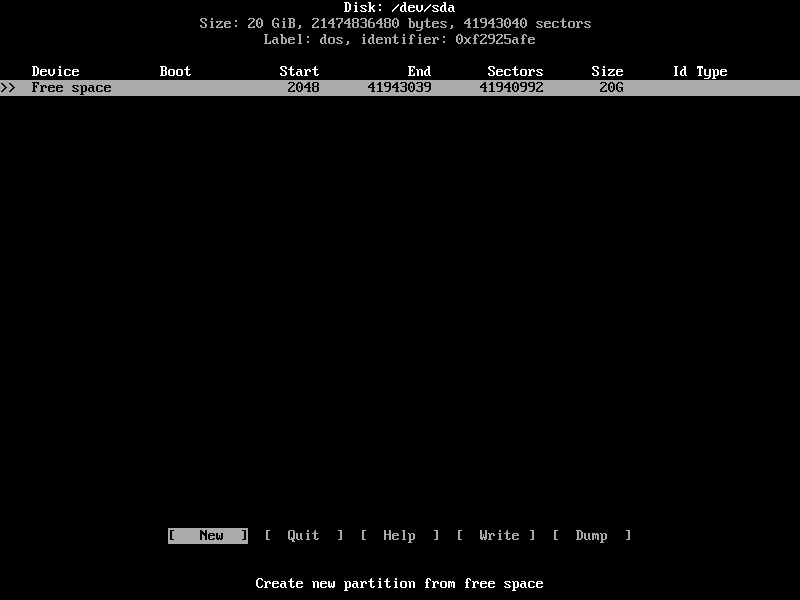
Navigate to
Newon the options menu on the bottoms and pressenter. Give the partition size as10G, where G stands for Gigabytes.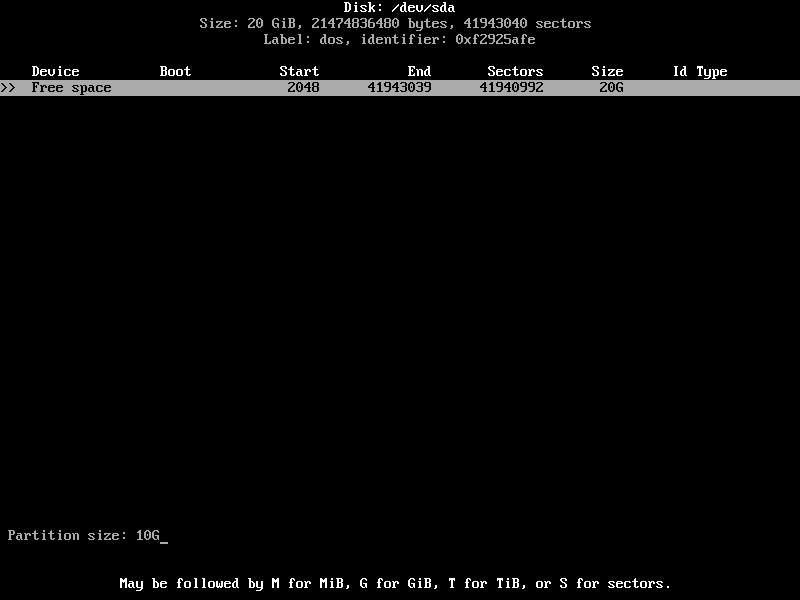
Press
enterand chooseprimarypartition.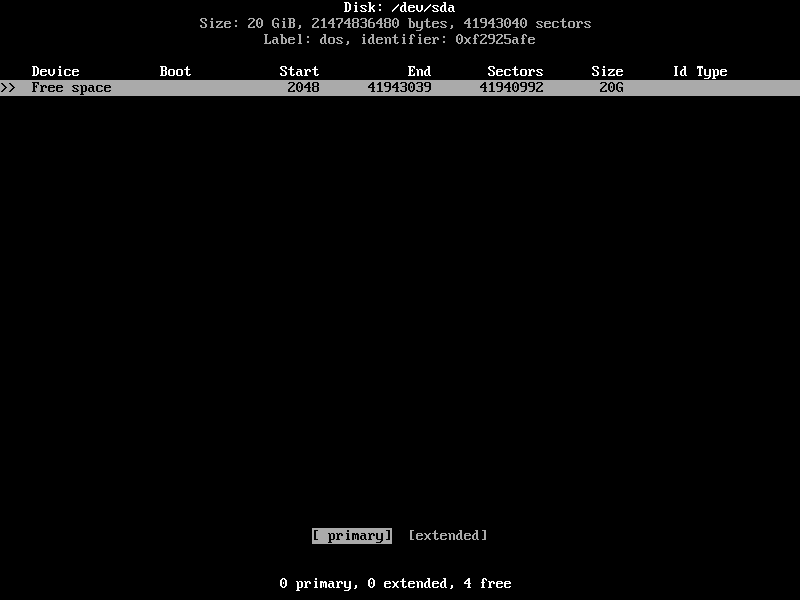
Now navigate to
Bootableon the bottom options menu and pressenter. This makes/dev/sda1a boot partition.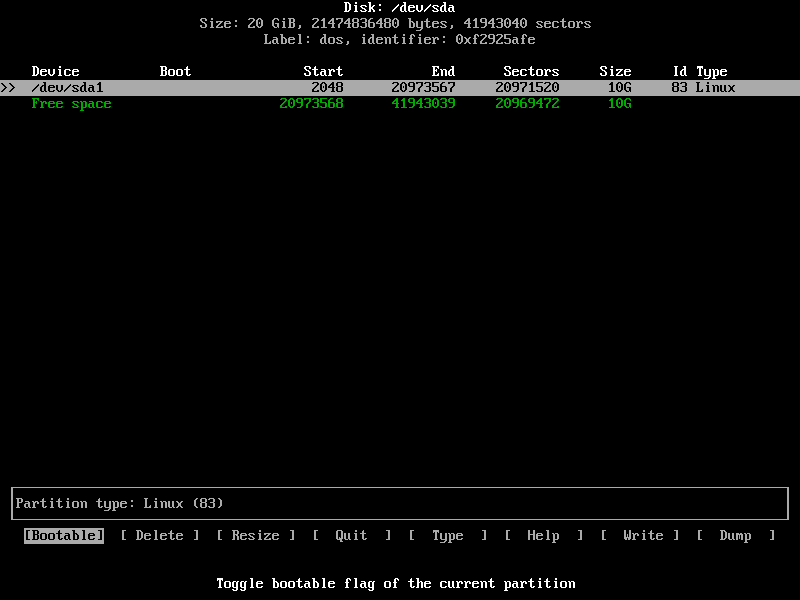
Next, navigate to
Writeon the bottoms options menu and pressenter. Type inyesand hitenter. This writes the/dev/sda1partition to disk.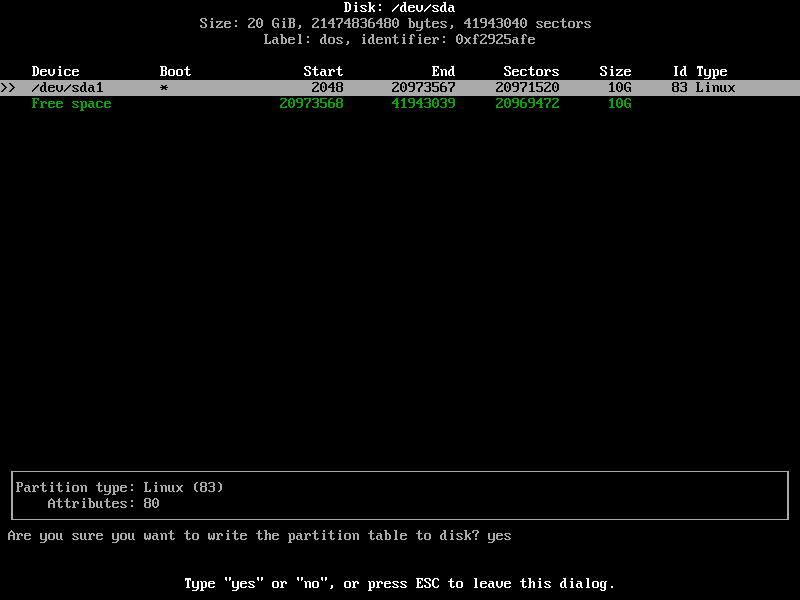
The 10GB primary boot partition has been created successfully.
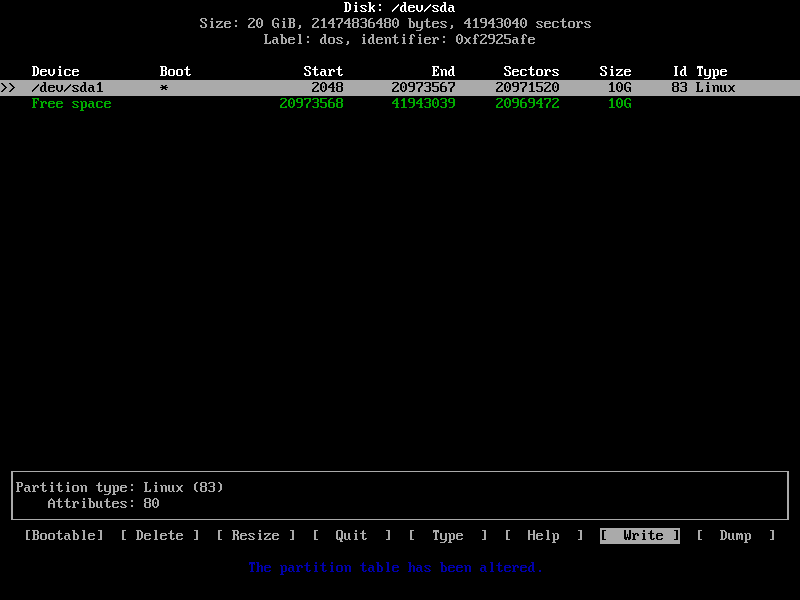
-
Now navigate back to
Free Spacewhich has now reduced to 10GB and repeat all the above processes (except setting as boot partitions) for the next two partitions - 2GB and 8GB. Don’t forget toWritethe partitions to disk!After all the partitions have been made, navigate to
Quiton the bottom options menu and pressenter.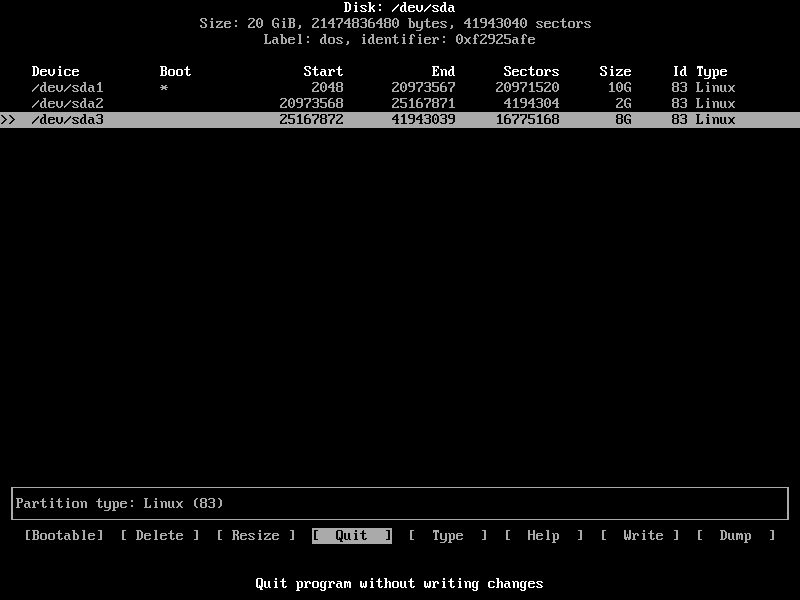
P.S. You can use the clear command when and where you feel necessary to clean up the terminal window
-
Next, we format the newly created partitions.
mkfs.ext4 /dev/sda1here,
mkfsstands for make file system,ext4is a file system type and/dev/sda1is the partition name. Repeat the same for the second drive.mkfs.ext4 /dev/sda3and for the swap partition,
mkswap /dev/sda2here,
mkswapis the make swap command which creates a swap area in the/dev/sda2partition. Swap area is the storage space which is used by the OS when the RAM is completely filled. - Now, activate the swap area by using the
swaponcommand.swapon /dev/sda2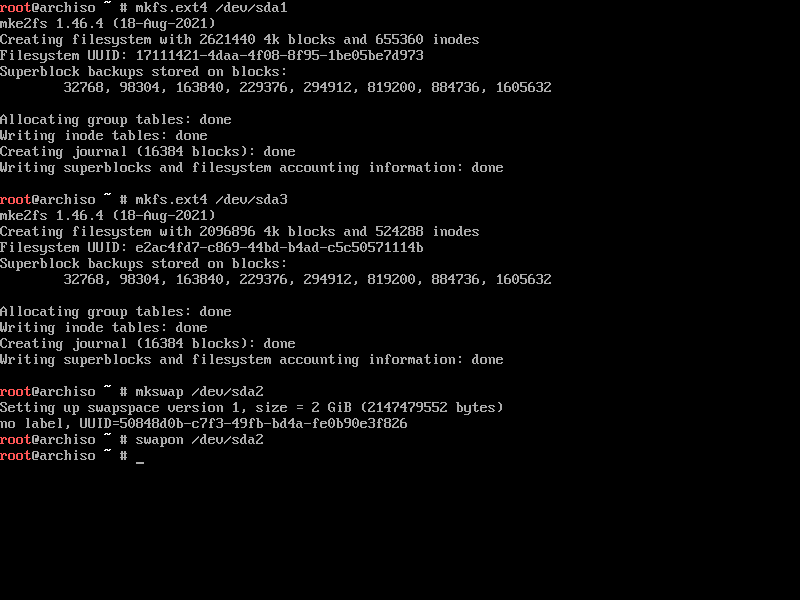
- Now, we need to mount the primary partition.
  mount /dev/sda1 /mnt
  mkdir /mnt/home
  mount /dev/sda3 /mnt/home
Bootstraping the OS
We have reached the actual installation part of Arch now xD. We use the pacstrap command which is designed to create a new system installation from scratch. The base-devel package does not contain many of the needed packages and hence those won’t be installed. I have chosen to install the linux-kernel, a text editor (nano), a browser (firefox), man-db for the man command and some others. A full list of available optional packages can be found here.
pacstrap /mnt base linux linux-firmware nano which man-db man-pages texinfo firefox dhcpcd

You can see the data packages being synchronised:
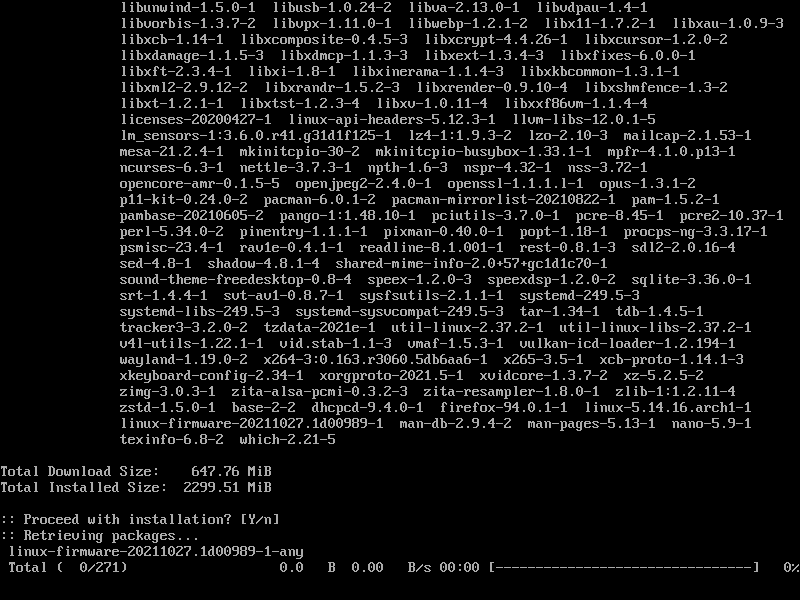
The installation proess starts and can take a few minutes to complete.
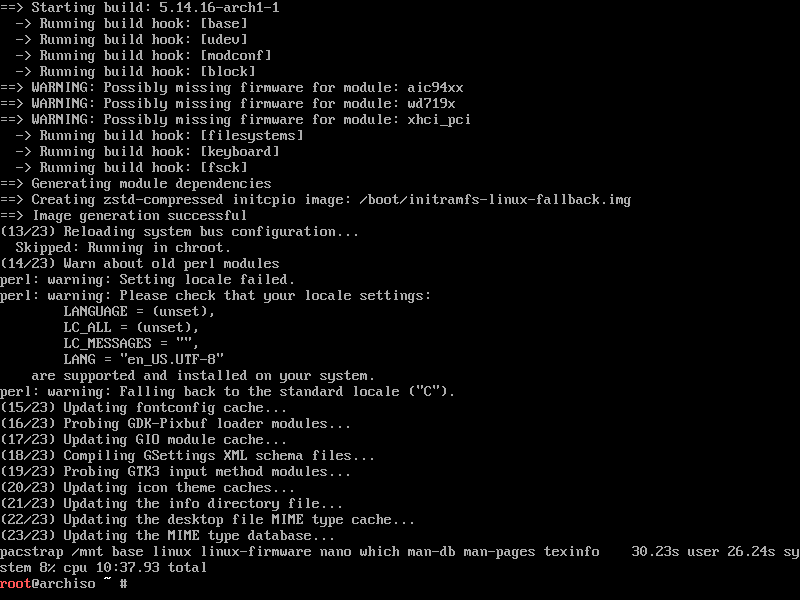
After the installation, we need to create the fstab file. It is a system configuration file which contains all the available disks, their partitions and options, designed to ease the burden of mounting and unmounting partitions. fstab stands for file system table.
genfstab /mnt >> /mnt/etc/fstab
Time and Language Settings
Change the system root to the Arch Linux install directory by using the chroot (change root) command.
arch-chroot /mnt /bin/bash
To configure the language settings, open the locale.gen file with nano.
nano /etc/locale.gen
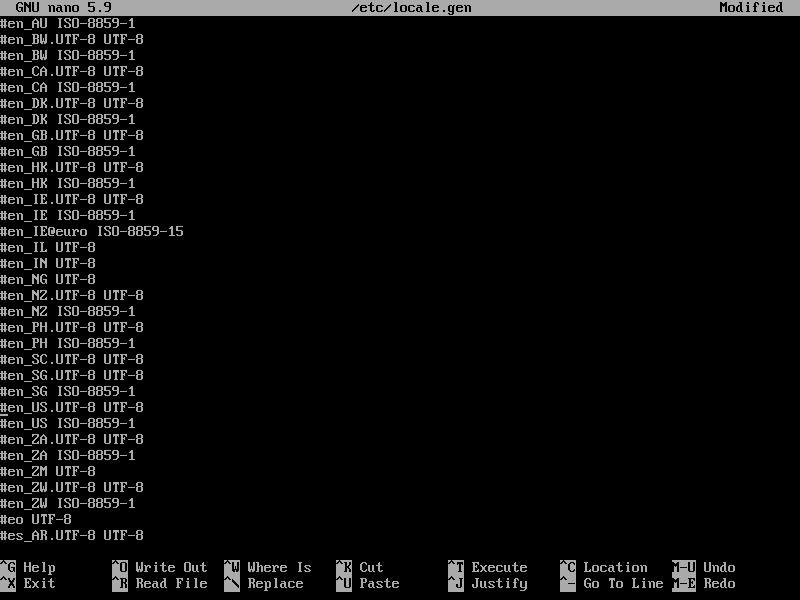
Select the en_US.UTF-8 UTF-8 language configuration (or any other of your choice) by deleting the # preceeding it and exiting from nano by pressing Ctrl+X. When prompted whether to save the buffer or not, press y and hit enter. Now activate the file by typing:
locale-gen
and press enter.
Now create the locale.conf file at /etc and add your chosen language to the system.
nano /etc/locale.conf

Add the following line:
LANG=en_US.UTF-8
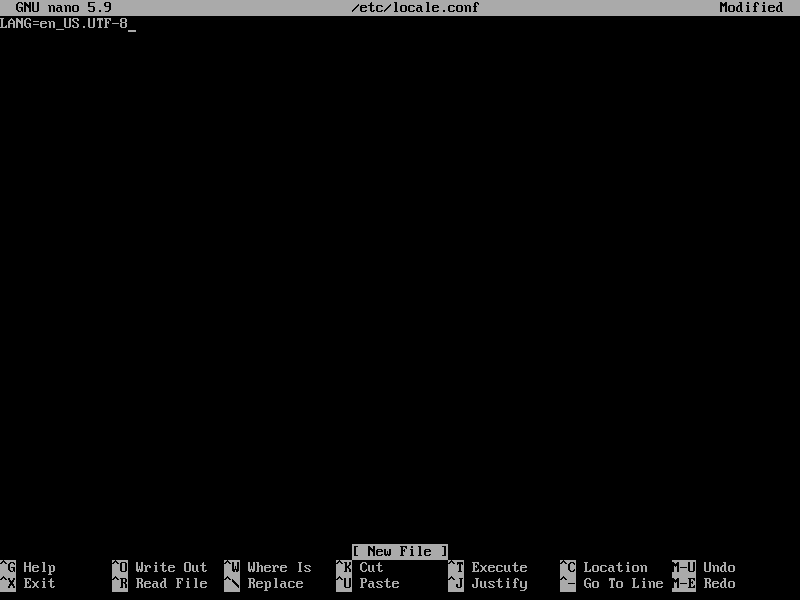
and exit from nano by pressing Ctrl+X, save the changes by pressing y and hit enter.
To get a list of time-zones around the world, type:
ls /usr/share/zoneinfo
If you want to see the time-zones within a specific continent, like say, Asia, type:
ls /usr/share/zoneinfo/Asia
Once you’ve figured out the time-zone you want to set, use the ln command:
ln -s /usr/share/zoneinfo/Asia/Kolkata /etc/localtime
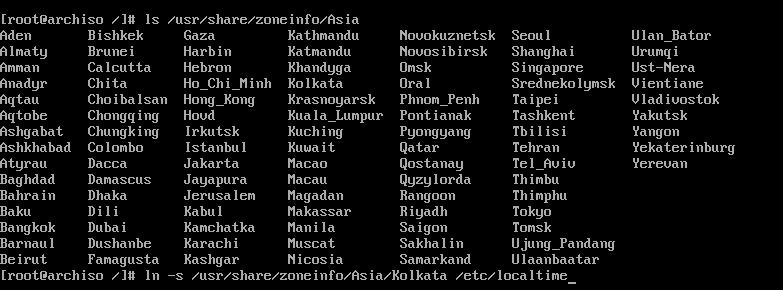
To synchronise the time with network obtained time, turn on ntp (network time protocol):
timedatectl set-ntp true
And now set the time standard using the hwclock (hardware clock) command to synchronise the hardware clock.
hwclock --systohc --utc

Password, Hostname and Netwroking
Set the root user password by using the passwd command.
passwd
Press enter, type the password and enter it again to confirm it.

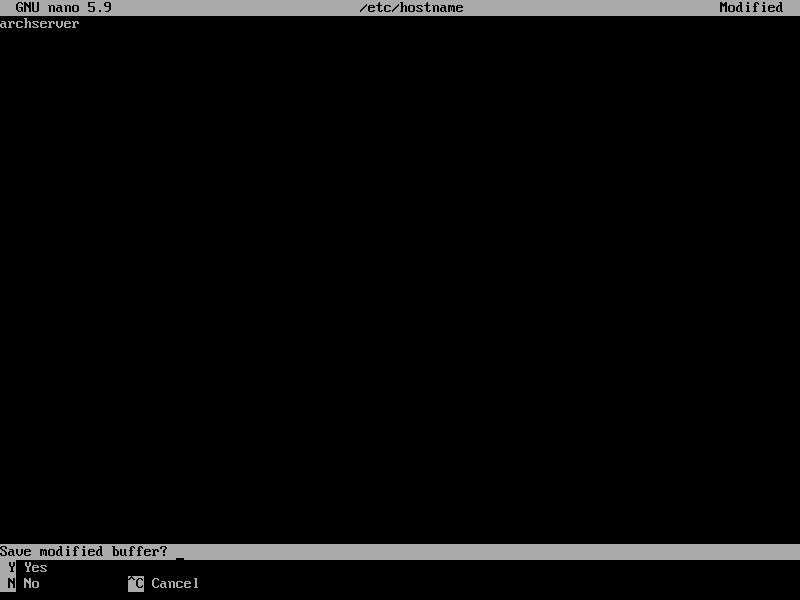
Enter the hostname of the network by typing:
nano /etc/hostname
Add a line containing the hostname and press Ctrl+C, press y and hit enter to save the changes.
dhcpcd is a DHCP (dynamic host configuration protocol - a network management protocol used to automatically assign IP addresses) and DHCPv6 client . Enable dhcpcd by typing:
systemctl enable dhcpcd

Bootloader Installation
The final step is to download and install a linux-compatible bootloader. I’m going with grub as it’s the most common and popular. Use the pacman command:
pacman -S grub os-prober
os-proberis used, as the name suggests, to probe for OSs to display in the GRUB menu in the case of dual boots and such.
press y, hit enter and the install begins.
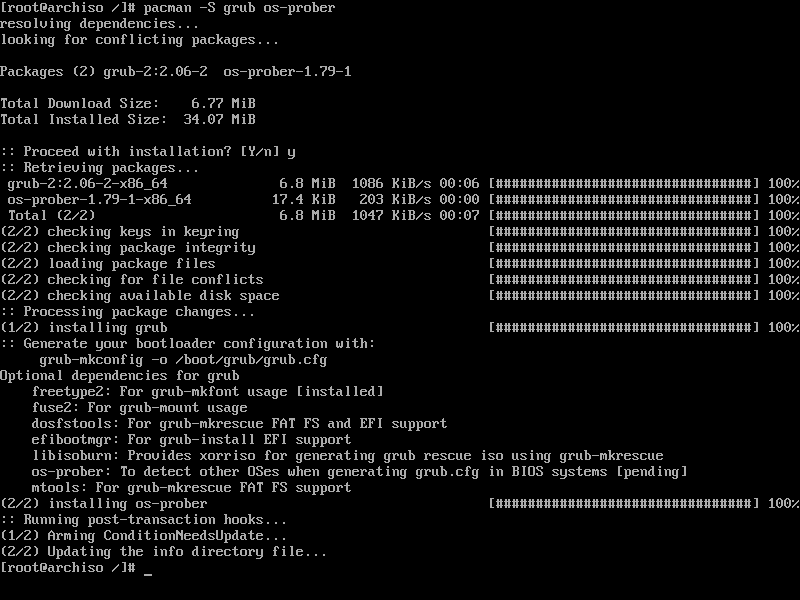
Install the grub bootloader to the disk:
grub-install /dev/sda
Configure the same by typing:
grub-mkconfig -o /boot/grub/grub.cfg
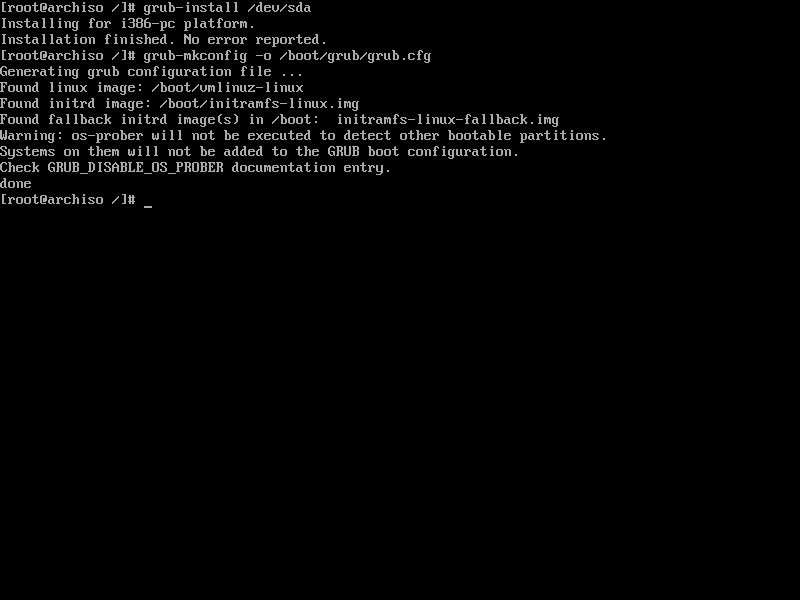
Now, we can exit from the chroot and reboot the virtual machine:
exit
and then
reboot
Booting into installed Arch
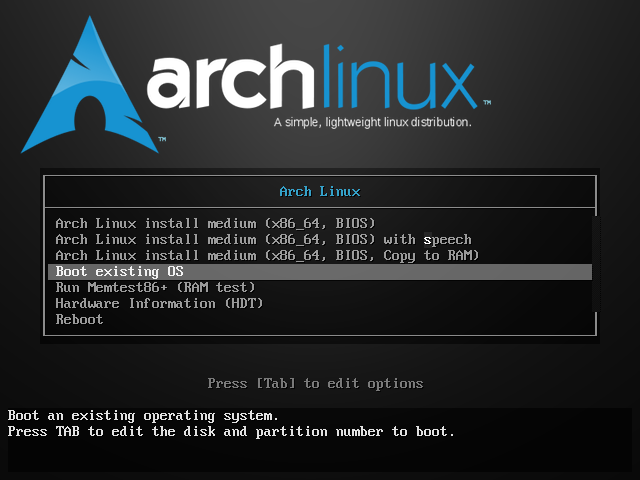
When the boot menu appears this time, choose Boot existing OS and hit enter.
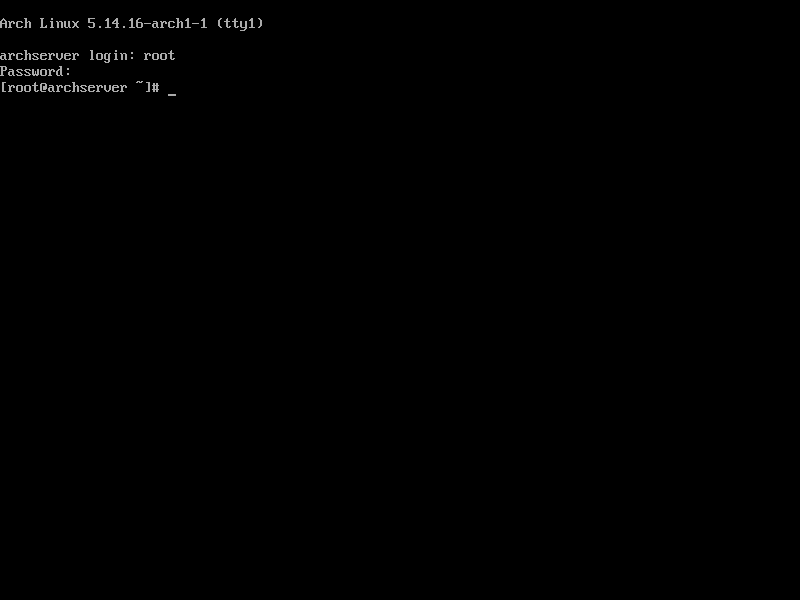
Login using the root login and password and you’re in your newly installed Arch Linux OS.
Closing Thoughts
Installing Arch Linux in itself might seem to be a herculean task. But the whole process helps one to gain new info on a variety of new things. And once you learn to setup and use Arch, the whole process of using the OS becomes a whole lot easier.Also you can finally say,
“I use Arch btw”
xD. Just keep in mind that the wiki is your best friend if you run into any trouble.
Cheers!
